Import, export and recover deleted resources Manage Java projects with Eclipse
Eclipse can be used to develop and manage Java projects. This includes exporting and importing as well as restoring accidentally deleted resources. The following post shows the possibilities.
 Exporting and importing is a not insignificant aspect when using Eclipse.
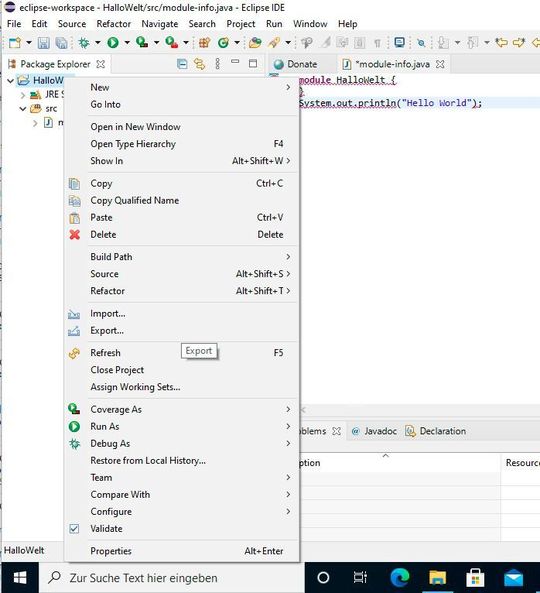 Projects can be exported and imported into Eclipse via the context menu of projects in Package Explorer.
(Picture: Joos / Eclipse)
In order to optimally secure projects and their current state, it is advisable to export them. The exported project files can also be re-imported or sent at any time. Eclipse provides tools to help with exporting and importing. Also restoring resources is possible with Eclipse.
Eclipse offers wizards that guide you step by step through the processes. By exporting or importing projects, it is also possible to exchange projects with other developers, for example by mail or by other means. Restoring resources also works when developers are working with source code management such as Git.
Exporting Java Projects to Eclipse
Java projects cannot be saved or exported in Eclipse simply by copying directories. Importing is also rather cumbersome in this way. However, Eclipse offers wizards that help with the processes and make exporting and importing much easier.
To export a Java project to Eclipse, the easiest way is to right-click the project or an empty area of the Package Explorer in Eclipse. If you want the wizard to save several projects or all projects at the same time, it does not matter which project is clicked. In the wizard, several projects can later be exported to an archive at once.
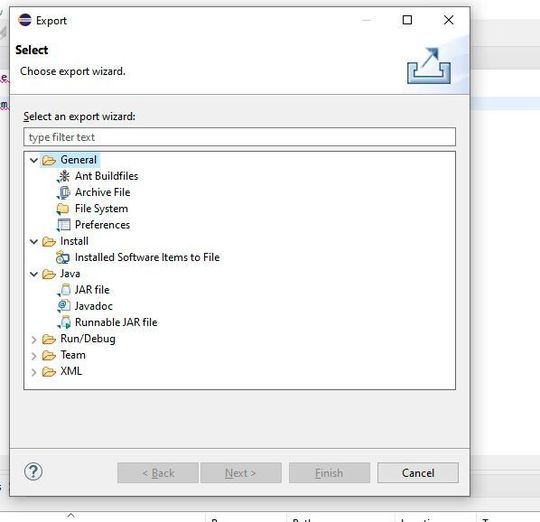 Select the options to export projects.
(Picture: Joos / Eclipse)
The “Export” menu item opens a window with which the export begins. “General” provides options for how Eclipse should export the project. Easy is the way here via the option “Archive File”. The advantage here is that the archive can be used very flexibly.
On the next page of the wizard, Eclipse displays all projects. Here, the project that Eclipse should export is selected. Of course, several projects can also be archived in parallel. Directories such as “bin” can also be deactivated via the wizard, since they are usually not necessary for the export.
In the field “To archive file” you can control to which directory the archive should be exported. With” Options ” you can specify whether Eclipse should create a ZIP archive or a TAR archive. By default, Eclipse aggregates the selected resources and exports them with their child files.
The window shows the resources that Eclipse exports. By setting checkboxes, you can define which areas of a project Eclipse should export. The “Create directory structure for files” option controls how Eclipse creates directories for the project’s resources in the ZIP file.
By default, the wizard also compresses the data. If this is not desired, the check mark “Compress the contents of the file” must be removed. If you also want the wizard to export the linked resources, the check mark “Resolve and export linked resources” is helpful.
In the archive Eclipse creates a new directory with the name of the project. The individual resources and files of the project can be found within the directory. The archive can of course also be used outside of Eclipse.
Import data from archives
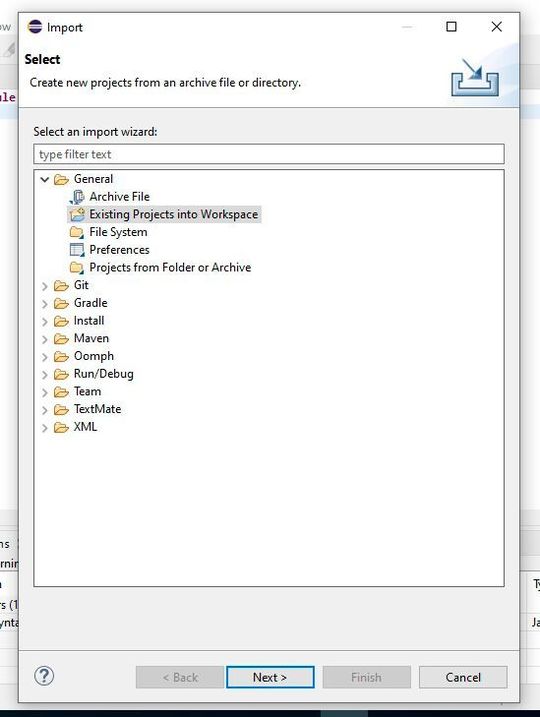 Import exported projects into Eclipse.
(Picture: Joos / Eclipse)
The exported archives can also be integrated into existing projects via an import wizard in Eclipse. Again, the wizard starts again via the context menu. Selecting “Import” again opens a window with various options for importing the data.
To import existing project data, the option “Existing Projects into Workspace” below the menu item “General” makes sense. Complete projects from an Eclipse export can be integrated into Eclipse.
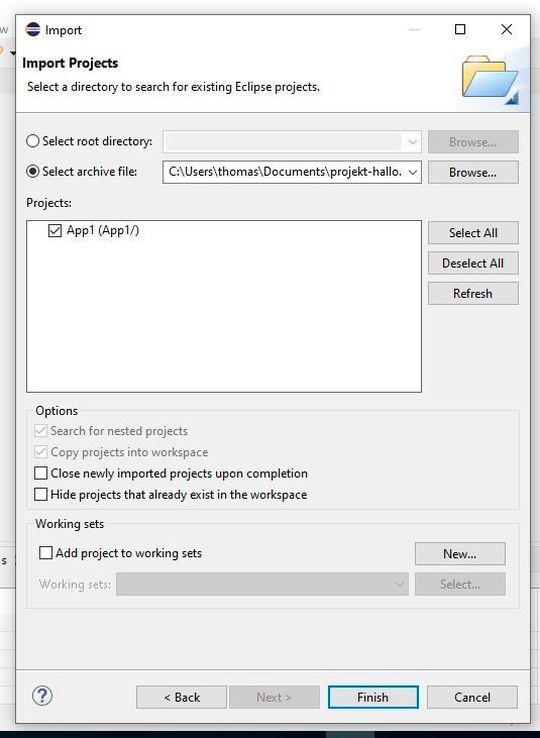 Select the import options for a project.
(Picture: Joos / Eclipse)
On the next page, the ZIP file can be selected at “Select archive file”, from which the wizard should import the data. After that, the import process starts with “Finish”. Eclipse extracts the directory and integrates the projects saved in the ZIP file. However, no projects that currently exist in Eclipse can be imported via this way.
Restoring Resources in Eclipse
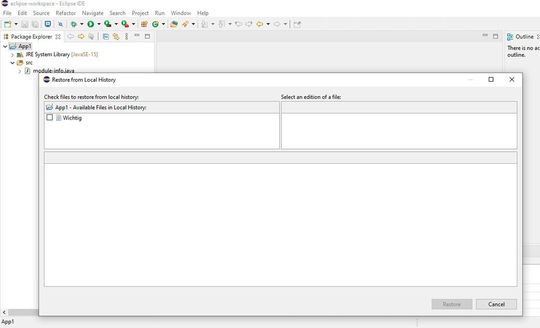 Restore files and resources in Eclipse.
(Picture: Joos / Eclipse)
Previously deleted resources from a project can be restored with on-board resources. The process starts via the context menu on the project in the Package Explorer by selecting “Restore form Local History”. If there is data in Eclipse that the IDE can restore, the wizard displays it.
Restoring the local data is also possible in some cases when developers are working with Git or another source code management tool. If recovery does not work in this way, recovery tools such as Recuva or TestDisk may be able to recover the files from the hard drive used.
Recovering accidentally deleted files shows the importance of regularly exporting a project to Eclipse. In the created archive, the respective files can also be found and can be produced much easier than using complex tools for source code management. Exporting an entire project on a regular basis can save a lot of work if deleted or accidentally modified files are to be recovered.
(ID: 47407940)


